How do you hold a plank with good form?
Rep range, rest and load step from the Month6 exercise catalog; last updated .
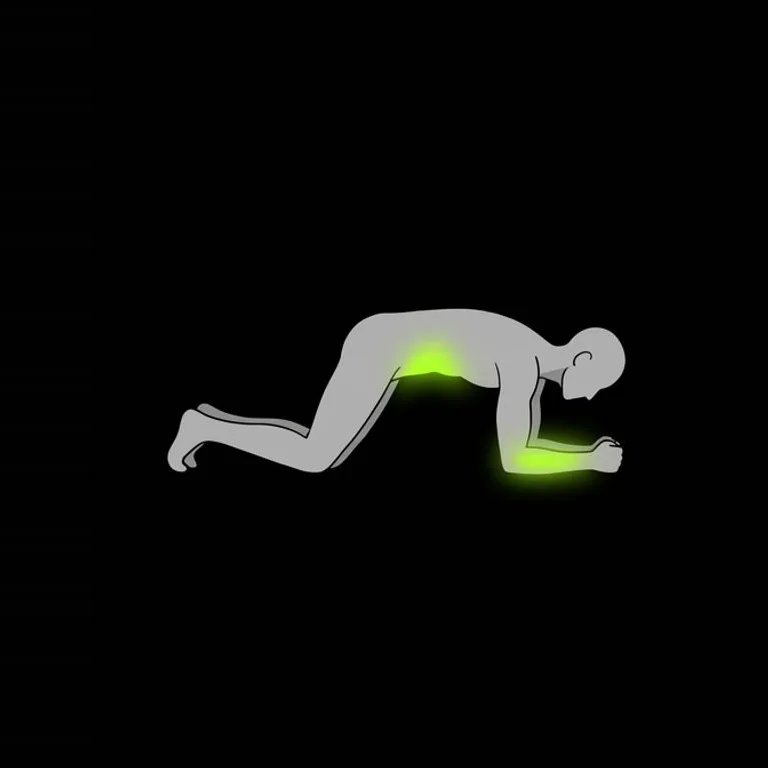
1 Set elbows and brace
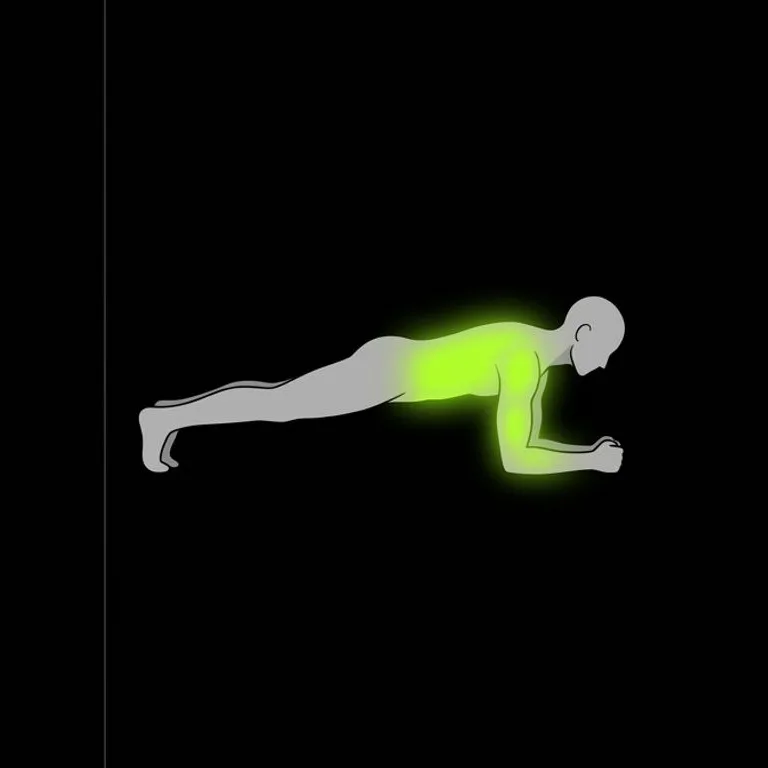
2 Hold the straight line
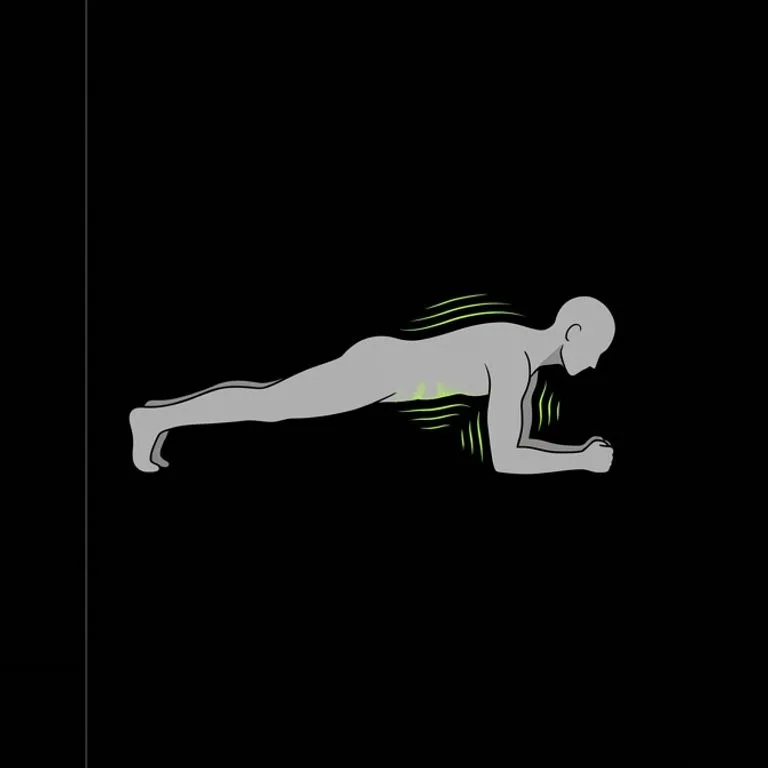
3 Keep breathing steadily
Plank at a glance
| Plank | |
|---|---|
| Primary muscles | front of the midsection (rectus abdominis and transversus abdominis) |
| Also works | obliques, glutes, front of the shoulders, quads |
| Equipment | Bodyweight |
| Hold | 30–60 seconds |
| Rest between sets | 60 seconds |
| Load step | Bodyweight |
The plank is a hold, not a movement. You prop yourself on your forearms and toes and keep your body rigid and straight, like a board, for a set length of time. Nothing moves, and that is the point: the muscles of your midsection work to stop your hips from dropping toward the floor, which is the same job they do when you brace under a heavy squat or carry shopping bags up the stairs.
People train it because it teaches bracing in the simplest possible position. There is no load to manage and no technique to time, just you, the floor and a straight line. It needs no equipment and fits at the end of almost any session. It also gives you a clear way to check progress: a longer clean hold, or a harder version of it, shows that your trunk is getting stronger at resisting a sag.
How to set up
- Kneel on a mat and place your forearms on the floor with your elbows directly under your shoulders. Your forearms can be parallel, or your hands can meet loosely in front of you; pick whichever feels steadier.
- Step your feet back one at a time until your legs are straight and you are resting on your toes. Set your feet about hip width apart. Wider feet make the hold more stable, narrower feet make it harder.
- Look at the floor just ahead of your hands so your neck stays in line with your spine. Do not lift your chin to look forward or drop your head toward the floor.
- Before the timer starts, check your line from the side if you can, using a mirror or a phone camera. Shoulders, hips and ankles should sit on one straight slope.
How to do the plank
- Push the floor away with your forearms so your upper back fills out slightly instead of sinking between your shoulder blades.
- Squeeze your glutes and tuck your pelvis a touch, as if you were trying to point your belt buckle toward your chin. This flattens your lower back and stops it from arching.
- Pull your ribs down toward your hips and tighten your midsection as if someone were about to poke your stomach. Hold that brace the whole time.
- Breathe in short, steady breaths through your nose or mouth without letting the brace go. Holding your breath makes the hold feel harder sooner and does not help.
- End the set as soon as your hips start to sag or creep up, or your lower back starts to work. Lower your knees to the floor, rest, and start the next set fresh.
Cues that help
- Belt buckle to your chin. A small tuck of the pelvis takes the arch out of the lower back and puts the work on the abs, where you want it.
- Squeeze the glutes like you are holding a coin. Tight glutes lock the hips in line and stop them from drooping toward the floor late in the hold.
- Pull your elbows toward your toes. Dragging the forearms back without actually moving them tightens the whole front of the body and makes a short hold much harder.
- Push the floor away. Driving through the forearms keeps the shoulders active and stops your chest from sinking between your arms.
- Quality over the clock. A shorter hold in a straight line trains the brace. A longer hold with sagging hips mostly trains you to hang on your joints.
Common mistakes
- Hips sagging toward the floor. Squeeze the glutes and tuck the pelvis. If they keep dropping, end the set there; that is the honest length of your hold today.
- Hips piked up high. Lower them until your body forms a straight line. Piking shortens the lever and makes the hold easier without training the brace.
- Holding your breath. Keep breathing in small, steady breaths behind a tight midsection. Learning to brace and breathe together is part of what the plank teaches.
- Chasing ever-longer holds with poor form. Once you can hold well for the top of the range, make the plank harder instead of longer. A tighter brace or a harder variation is better use of your time.
Who it suits
The plank suits beginners learning to brace and anyone who wants simple, equipment-free core work at the end of a session. It is a useful first step before harder trunk exercises because it teaches you to keep a straight line under load.
If the plank bothers your shoulders, elbows or lower back, stop and choose a swap. A side plank shifts the work to the sides of the trunk, a dead bug trains the same brace lying on your back, and an ab wheel builds on the plank once it feels easy.
How Month6 progresses it
Month6 starts the plank at a 30 second hold and lengthens it session by session toward 60 seconds.
The plank has no plate to add, so progress on it is more seconds at the same body weight, then a harder variation from the swaps below.
Rest on the plank is 60 seconds: an isolation or bodyweight movement recovers quickly.
The plank progresses by time first. Add a little to each hold until you can keep a clean line for the top of the range on every set. After that, a longer hold adds less than a harder version does.
To make it harder, squeeze everything tighter, bring your feet closer together, lift one foot off the floor, or rest a weight plate on your back with a partner's help. Each of these keeps the hold short while making your trunk work harder.
Swaps
- Side plank Take the side plank when you want to train the obliques and the sides of the trunk. Stack your feet or stagger them, keep your hips lifted and do the same hold on each side.
- Dead bug Take the dead bug when a front plank strains your shoulders or wrists, or when you are still learning to brace. Lying on your back, you keep the lower back flat while slowly lowering opposite arm and leg.
- Ab wheel rollout Take the ab wheel when the plank has become easy and you want a harder anti-extension movement. Roll out only as far as you can keep your lower back from arching, then pull back in.
Questions
Related exercises
More core exercises: Core · the whole library
Technique guidance for healthy adults, not medical advice; stop if a movement hurts. How every number is made, with its citations: Sources & method.
Log it, and let the plan move with you
Month6 logs every set of the plank in one tap, offers the swap when the station is taken, and adds load when you reach the top of the range.