How do you do a chin-up with good form?
Rep range, rest and load step from the Month6 exercise catalog; last updated .
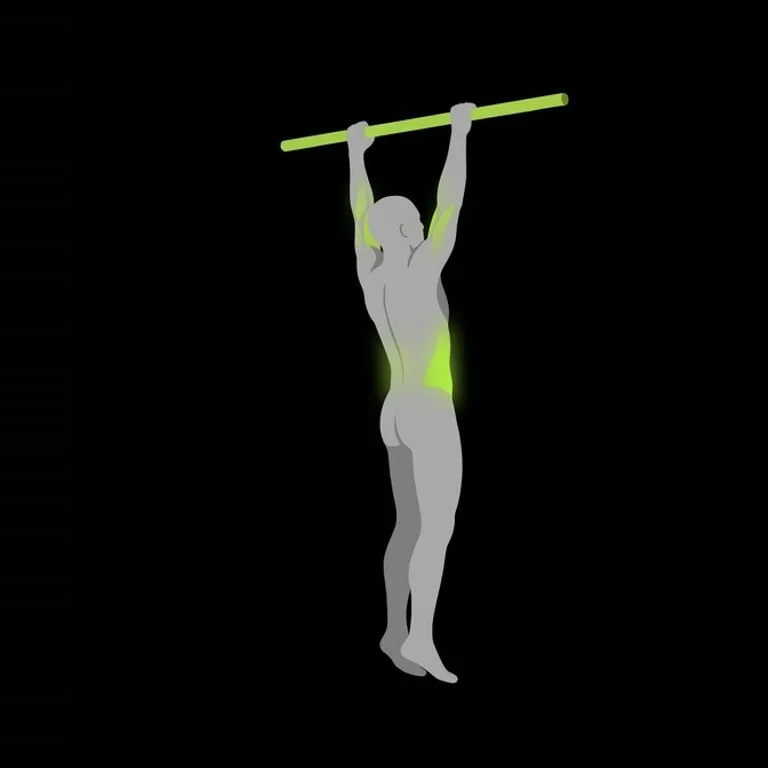
1 Set the grip, brace the core
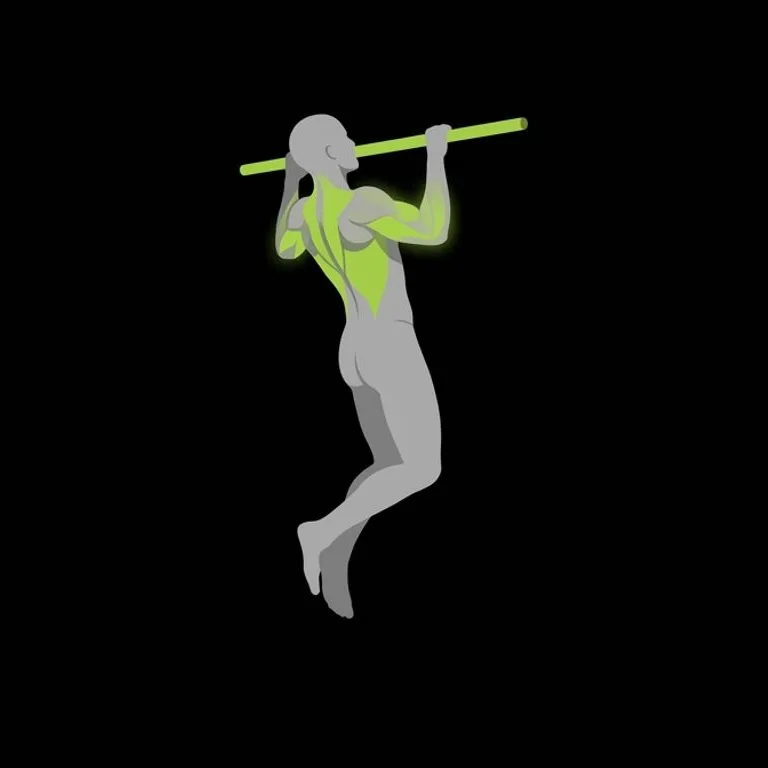
2 Pull with the elbows to full contraction
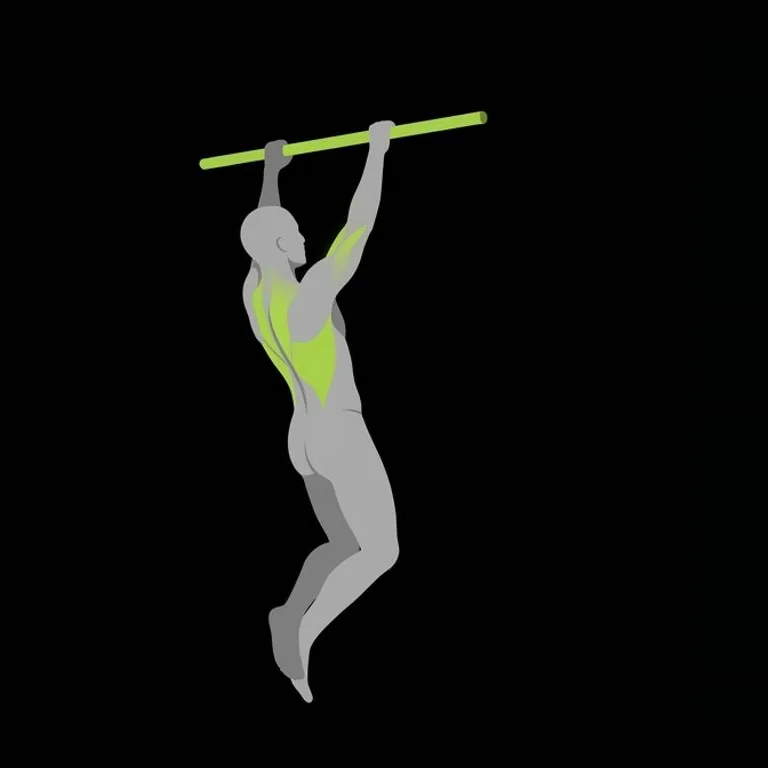
3 Control the stretch back
Chin-up at a glance
| Chin-up | |
|---|---|
| Primary muscles | lats, biceps |
| Also works | muscles between the shoulder blades, forearms and grip, abs bracing the trunk |
| Equipment | Bodyweight |
| Rep range | 4–12 reps |
| Rest between sets | 90 seconds |
| Load step | Bodyweight |
The chin-up is a vertical pull with your palms turned towards your face. You hang from a bar, bend your arms and lift your body until your chin passes the bar. It looks almost the same as a pull-up, but the underhand grip changes the line of your arms enough to change how the lift feels: the biceps join in as a main driver rather than a helper.
That makes the chin-up a favourite for two kinds of lifter. Beginners often find it the first bodyweight pull they can do for real reps, and anyone who wants big arms likes that it loads the biceps heavily alongside the back. It needs nothing but a sturdy bar, it scales with your strength and body weight, and its rep count is a simple, honest measure of progress.
How to set up
- Reach up and take the bar with your palms facing you and your hands about shoulder width apart, or a touch narrower. Close your thumbs around the bar for a secure grip.
- Hang with your arms straight and let your body settle without swinging. If the bar is low, tuck your feet behind you with knees bent so they never brush the floor.
- Pull your shoulder blades slightly down and together, just enough that your shoulders leave your ears. Your arms are still straight; only your shoulders have moved.
- Brace your stomach and squeeze your legs together. A firm trunk turns your body into one rigid piece that is easier to lift than a loose one.
- Glance up at the bar to aim, then bring your gaze level. You want to see the bar come down to you, not tip your head back to meet it.
How to do the chin-up
- Bend your elbows and pull them down and in towards your sides. Because your palms face you, the elbows naturally stay in front of your body and close to your ribs.
- Rise until your chin is above the bar. Try to bring your collarbones towards it as well, which keeps the back working at the top instead of leaving it all to the arms.
- Hold the top for a brief moment with your elbows tucked and your shoulders still pressed down.
- Lower under control until your elbows are fully straight. Feel the biceps and lats lengthen on the way down rather than letting the bar catch you at the bottom.
- Keep your legs quiet and your trunk tight between reps. If you need to swing to start the next one, end the set there.
Cues that help
- Elbows into your ribs. Driving the elbows down and close to your sides gives the lats a long pull and keeps the shoulders in a comfortable line.
- Collarbones to the bar. Aiming slightly higher than the chin makes you finish the rep with your back as well as your arms.
- Squeeze the bar hard. A strong grip switches on the forearms and upper arm, so the whole chain from hand to shoulder pulls together.
- Legs together, toes slightly forward. A tight lower body leaves no room for a kick, which keeps your reps strict and your count honest.
- Slow on the way down. Controlling the descent works the biceps and lats under load and sets you up for a clean start on the next rep.
Common mistakes
- Stopping with the arms still bent at the bottom. Straighten your elbows fully before every rep. A partial range hides weakness at the bottom and makes your log less useful.
- Using a very narrow, close grip. Set your hands around shoulder width. Hands jammed together can crowd the wrists and elbows and shorten the pull for the back.
- Turning it into an arm curl and nothing else. Start every rep by pulling the shoulders down, then bring the chest towards the bar. The arms bend because the back is pulling, not instead of it.
- Rocking the body to build momentum. Hold a firm, slightly hollow body and pause briefly in the hang between reps. If the swing comes back, the set is done.
- Letting the shoulders creep up at the top. Keep the neck long through the whole rep. Rising shoulders usually mean you are reaching with the head rather than finishing the pull.
Who it suits
The chin-up suits beginners chasing their first bodyweight pulls, lifters who want arm work built into their back training, and anyone training at home with a single bar. It is often the most comfortable vertical pull for people whose shoulders dislike a wide grip.
If your wrists or elbows complain with the palms turned up, or you cannot yet lift your body weight, use a swap. A pull-up uses a different hand position, and a curl works the biceps with a load you can choose. Stop whenever something hurts and pick another option.
How Month6 progresses it
Month6 starts the chin-up at the bottom of its range, 4 reps, and adds reps session by session until every set reaches 12.
The chin-up has no plate to add, so progress on it is more reps at the same body weight, then a harder variation from the swaps below.
Rest on the chin-up is 90 seconds: long enough to repeat the effort, short enough to keep the session moving.
Progress on the chin-up shows up as reps: an extra one on the first set, then on the second, until every set has climbed. Track the total reps across all sets as well, because it often rises before the first set does.
If you are stuck, add a few slow lowerings at the end of the session, or pause at the top of each rep for a short count. Both make your current reps harder without needing a new piece of kit. Sleep and steady eating will do more for a plateau than another round of failed attempts.
Swaps
- Pull-up Move to the pull-up when chin-ups start to feel easy and you want a stricter test of the back. Turning the palms away takes some help from the biceps, so expect fewer reps at first.
- Cable curl Use the cable curl when you cannot reach a bar or when you want biceps work without hanging from your hands. The cable keeps tension on the arm through the whole curl, top and bottom.
- Dumbbell curl Pick the dumbbell curl when the gym is busy, your grip is tired, or you just need arm work that day. It trains the biceps directly with a load you choose, though it leaves the back out.
Questions
Related exercises
More back exercises: Back · the whole library
Technique guidance for healthy adults, not medical advice; stop if a movement hurts. How every number is made, with its citations: Sources & method.
Log it, and let the plan move with you
Month6 logs every set of the chin-up in one tap, offers the swap when the station is taken, and adds load when you reach the top of the range.